Hello!!
It's actually been awhile since I've posted on this blog — Life, Business, The Economic Mess, etc. have all kept me busy, so this blog has been kinda forgotten — Sorry…
I've also moved a lot of my "news, thoughts and photos" to Facebook, getting caught up in that whole thing too, but it's almost starting to pay off now. Now, you can get more up to date news if you "Like" our Facebook pages — Alternative Focus & Tony Locke Photography to keep track of our events and fun tips and tricks.
Also during all that time, we've made several changes to our company and it's offerings, along with adding a new, more active website, which also houses my blog now too. I will be consolidating my other blogs (Tony's Photoshop Tips & Tricks and Eruisko Travel Photography) there too — So, if you're one of my blog followers, move on over to BlameItOnTheLight.com (no caps needed), sign up for our newsletter, and enjoy all of the new things going on.
We've also started two other side companies, loosely related to our photography work, as we're still working with artists, but have broadened our reach.
Armchair ePublishing is our eBook and book layout company, working with indie authors to get their page layout and book cover designed, allowing them to sell and self-publish their books. That eats up a lot of my time. And also helps pay more of the bills.
Alternative Inbound Marketing started off as building websites and marketing for artists, but has grown to include many companies of all types, that would like great marketing, social media presence on Facebook, Twitter, etc. and a company website, all from one source. This eats up a lot of Karla's time, and help pays the bills too.
If you, or anyone you know can use any of these new services, please let us know. We're now working internationally.
So, that's the latest news. Hope you all come on over and join us at our new place.
Thanks,
Tony D. Locke, MM

Wednesday, September 9, 2015


Friday, August 19, 2011
Hello,
As many of you already know, I've moved most of my blog posting over to a Wordpress based site with the same name: Tony's Photographic Blog. Here's my latest entry over there while you're here visiting. But go ahead and go there and update your bookmarks and RSS stuff while you're there.
Part of learning photography is to take on new challenges, experiences and projects. As a catalyst to egg me on to keep shooting something different each week, I've joined a group called Focus52 - Shoot at least one new photo a week for 52 weeks. Most weeks have a Prompt for you to follow too.

This photo shows the main set-up. First, before you start adding water to the glasses, get everything else in place, experiment with placements, angles and lights long before you start tilting the platform the glasses are sitting on, and especially before adding water to the experiment. I spent a good part of the evening, just trying to figure out the best placement of lights, including the light-table I used as a backdrop. Turns out, it's a bit smaller than I needed, so I had to get the glasses as close to it as possible so that edges didn't show. The rest of it is just moving things around, take a shot, look at your screen, adjust as necessary the props/lights/camera settings, shot again, look at your screen, repeat as necessary.
I was mostly going for the best even lighting with the fewest reflections, especially bright spots in the glass. I don't have any soft-boxes, so I had to make due with what I had. If I had a little bit more time, I would have tried a few other things too.
Once you're pretty comfortable with your set-up, it's time to start tilting the platform that the glasses are on. My first set of test shots didn't have enough of an angle for what I wanted, so I had to tilt a bit more. I just used a cardboard box with a rubber placemat on top. Notice to the side a couple of measuring cups I used as 'technical spacers' to hold the box at the angle I needed. Also, I used a couple of standard 'cereal bowls' to get the light-table up to the the proper height I discovered I'd need once I started tilting things.
You'll also notice a ruler on hand for proper spacing of the glasses - And important - A towel to not only clean fingerprints off the glass, but water spots during the shoot too. Off to the other, "down-hill side" is a larger towel, just in case gravity takes over a little too much.
Once I got the proper angle, then it's a matter of tilting the camera so that it's still parallel and square with the glasses and platform. A ruler helped here too, make sure you're square from left to right also.
Now it's just matter of adding water. I used a small little pitcher that allowed me to pour a bit more accurately, with less spills and splashing. From there, it's must more experimenting as too how much water you'll need. Keep that towel handy, as you're going to need to dab out water spots still.
Every step of the way, I'd fire off a couple shots, just in case. Tweak the lights as needed, play some more and shoot some more.

As for the colored water; I was going to use food coloring (I even thought about using juice at one point, but that's very messy to clean-up and expensive too), but didn't have any, so the colors were added in Photoshop afterwards - Which is another lesson on my Photoshop blog for another day.
Enjoy, experiment, have fun,
Tony
Saturday, May 28, 2011
I've Moved – Follow Me To My New Sites
Hello, first, I'd like to Thank all of you that have followed me over the years. I know there haven't been many of you yet, but I do appreciate those of you that have. And, I know that I'm not real punctual at keeping this site up to date, but I do try, and will increase the posts even more now that I've made some changes. I'm still in the process of learning about all of this blog business stuff, as I've still got a lot of fun teaching about photography to pass on. So read on, have fun and pass the word to all your friends to follow me too.
In order to kind of concentrate my thoughts, messages and/or ideas (I know, those who know me are probably laughing when I said "concentrate"... Ha, go ahead, laugh), I've moved to a WordPress based web-site and have broke things into three different venues of teaching:
Tony's Photography Tips, which will concentrate on camera's and general photography skills in general. Even though photography equipment has made some huge advancements in the last 5 years or so, the basics of photography and how your camera makes an image are all still the same. In order to be a great photographer, you'll need to at least be comfortable with the "tools" that are available.
Tony's Photoshop & Lightroom Tips, which will concentrate on, you guessed it – Photoshop & Lightroom Tips and Ideas. Both of these "Digital Darkroom" packages have come a long ways, and are even more powerful today, providing an unprecedented amount of power to todays photographer that likes to work on their own images after the shot.
And now my latest addition – Eurisko Adventures. This latest web-site will concentrate more on the specifics of travel and adventure photography. There are those that specialize in weddings, family/senior portraits, pets, food, architectural, etc. Me, I like to travel and explore, which generally includes a little bit of adventure – This is a place for me to tell you how you can too.
As always, go to my Facebook; Tony Locke Photography to keep up with all that's going on, make sure you LIKE it so that you'll receive all the news that news. Also, make sure you go over to Alternative Focus Workshops Facebook (shared with That Photo Shoppe), LIKE it too, and the Blog to sign up for our newsletter and keep up with our on going (and very exciting) Photography, Photoshop & Lightroom Workshops. You just missed a great 2-day workshop on San Juan Island.
So, move on over to the new sites, bookmark them, LIKE them and of course – Tell Your Friends Too! We've got a lot of new ideas, events and other fun things coming up this year.
Thanks again for coming by,
See you at the new and improved places for me to get all of these ideas out of my head,
Tony D. Locke, MM
(still reigning, Master of Madness)
In order to kind of concentrate my thoughts, messages and/or ideas (I know, those who know me are probably laughing when I said "concentrate"... Ha, go ahead, laugh), I've moved to a WordPress based web-site and have broke things into three different venues of teaching:
Tony's Photography Tips, which will concentrate on camera's and general photography skills in general. Even though photography equipment has made some huge advancements in the last 5 years or so, the basics of photography and how your camera makes an image are all still the same. In order to be a great photographer, you'll need to at least be comfortable with the "tools" that are available.
Tony's Photoshop & Lightroom Tips, which will concentrate on, you guessed it – Photoshop & Lightroom Tips and Ideas. Both of these "Digital Darkroom" packages have come a long ways, and are even more powerful today, providing an unprecedented amount of power to todays photographer that likes to work on their own images after the shot.
And now my latest addition – Eurisko Adventures. This latest web-site will concentrate more on the specifics of travel and adventure photography. There are those that specialize in weddings, family/senior portraits, pets, food, architectural, etc. Me, I like to travel and explore, which generally includes a little bit of adventure – This is a place for me to tell you how you can too.
As always, go to my Facebook; Tony Locke Photography to keep up with all that's going on, make sure you LIKE it so that you'll receive all the news that news. Also, make sure you go over to Alternative Focus Workshops Facebook (shared with That Photo Shoppe), LIKE it too, and the Blog to sign up for our newsletter and keep up with our on going (and very exciting) Photography, Photoshop & Lightroom Workshops. You just missed a great 2-day workshop on San Juan Island.
So, move on over to the new sites, bookmark them, LIKE them and of course – Tell Your Friends Too! We've got a lot of new ideas, events and other fun things coming up this year.
Thanks again for coming by,
See you at the new and improved places for me to get all of these ideas out of my head,
Tony D. Locke, MM
(still reigning, Master of Madness)
Sunday, February 13, 2011
2.2 of Tony's Tips For Creative Shutter Speed Images
Whether you’re inside photographing family or outside capturing a cowboy at the rodeo, knowing how to capture motion is an important photographic skill to practice. There’s “Normal shutter speed”, then there’s “Creative shutter speeds”.
Sometimes freezing the action is what’s needed, while other times using slow shutter speeds of up to 20 seconds or longer are required to get the right effect. Here are 2.2 techniques which will help you convey or imply motion in your images to your viewers. With these 2.2 techniques, it doesn’t matter whether you want to stop the action or add blur - You’re the one in control of your image.
Tip #1) Those Silky Water Shots. This technique is one of my favorites. Be fore-warned, these require very long shutter speeds - And a tripod. Water is an integral part of many landscape images, and to be creative you need to first ask the question: Will this image look better with the water frozen in place or silky and blurred?
Most of the time, unless it’s wave crashing up over some rocks, I prefer to have my water smooth and silky. These types of shots help set a different type of mood in your landscapes.
Most of the time, unless it’s wave crashing up over some rocks, I prefer to have my water smooth and silky. These types of shots help set a different type of mood in your landscapes.
What shutter speed works best? If you’d like to get that soft water effect, start with shutter speeds around 1⁄4 to 2 sec.
Again, you’ll need a tripod at these speeds. You want everything else in the scene; bridges, docks, rocks, trees, etc. to be rock solid (pun intended). Only the water, or in the case of this train too, should show any motion.

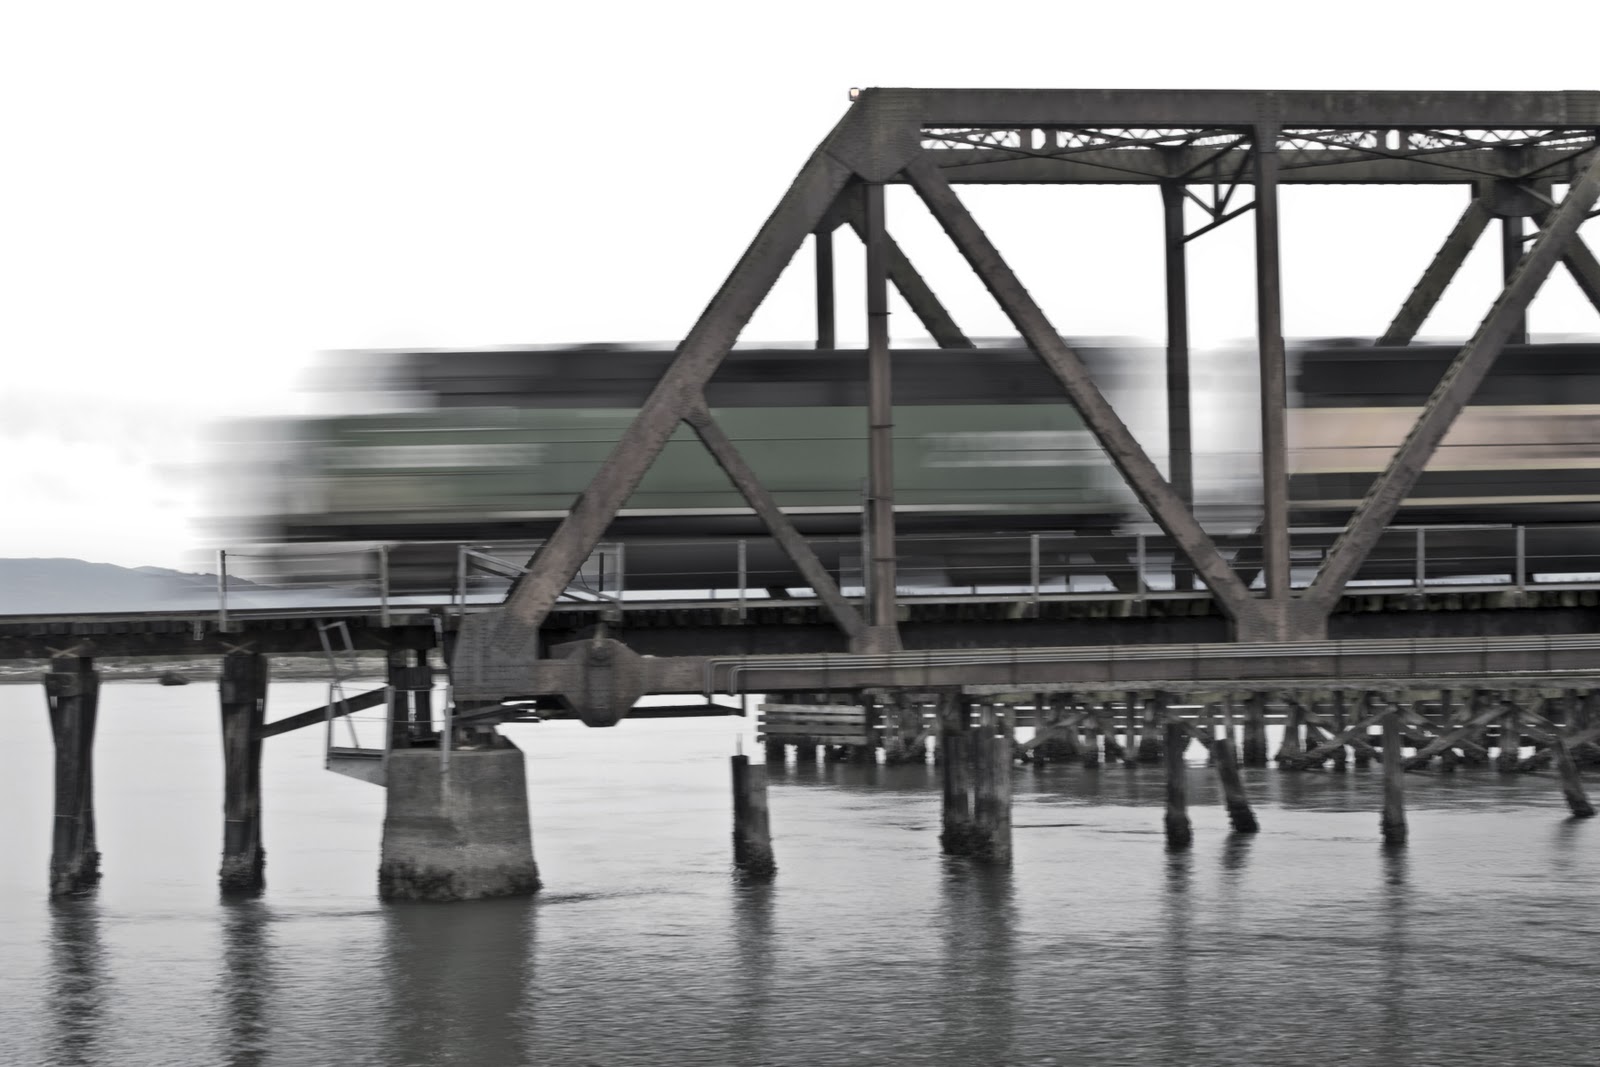
Would you believe that this train was only traveling at walking speed? With a long enough shutter speed, about 2 sec here, it looks like he's moving much faster - The magic of photography!
At these speeds your camera will still retain most of the detail and contrast in the water, it’s just going to be smoother. If you really want to have some fun, try shooting even slower, jump up to 15 to 30 seconds.
Now, in order to get these creative slower shutter speeds without creating an overly bright exposure, you’ve got to employ some other techniques to limit the amount of light that’s able to get to your sensor.
Now, in order to get these creative slower shutter speeds without creating an overly bright exposure, you’ve got to employ some other techniques to limit the amount of light that’s able to get to your sensor.
You’ve got several options. You’re first option is to set your aperture to ƒ/22 (Remember - The larger the number the smaller the aperture, the less light going to make it thru that hole). Also, if that’s not enough, adding a polarizing filter will reduce the light another one to two stops beyond that. This combination should allow for a shutter speed of around a several seconds.
This works even better on overcast, rainy days as the light levels will already be lower than sunny days - Plus, as an added bonus, your colors will be more saturated and the vegetation and rocks will have a nice wet sheen to them.
Who says you can’t have fun on rainy days? Some of my best shots are taken then. Now, when it’s pouring down and the wind’s blowing, sorry, but it’s not fun outside anymore.
OK, next. In-order to get those really, really slow speeds you see in some of those amazing images, you’ll need more help. You can add a relatively inexpensive Neutral Density (ND) filter or two to block some more of the light entering your lens. ND filters are essentially, dark grey pieces of glass which restrict light without altering colors. Depending on how much light you’d like to restrict for these slower shutter speeds, you could add incremental ND filters rated at 1, 2, or 3-stops each. Again, each stop of light reduction means one more click slower on your shutter speed settings, with each f-stop equaling half as much light as the previous setting. But - And you there was going to be a “But”, as everything has a trade off. These extra layers of possibly distorting glass, stacked on the front of your lens, may not be doing your images justice.
OK, next. In-order to get those really, really slow speeds you see in some of those amazing images, you’ll need more help. You can add a relatively inexpensive Neutral Density (ND) filter or two to block some more of the light entering your lens. ND filters are essentially, dark grey pieces of glass which restrict light without altering colors. Depending on how much light you’d like to restrict for these slower shutter speeds, you could add incremental ND filters rated at 1, 2, or 3-stops each. Again, each stop of light reduction means one more click slower on your shutter speed settings, with each f-stop equaling half as much light as the previous setting. But - And you there was going to be a “But”, as everything has a trade off. These extra layers of possibly distorting glass, stacked on the front of your lens, may not be doing your images justice.
Next option in the ‘ole tool bag. Everyone that loves long exposure photography loves the Singh-Ray Vari-ND filter. This great little toy enables you to incrementally dial in the amount of light blocked, anywhere from two to ten stops, with one (albeit slightly expensive) filter—How much blur would you like today sir?
With the Vari-ND or other ND filters, you can now photograph at speeds from 20 to 30 seconds in midday sunlight (though afternoon light looks nicer), providing those incredible silky waterfalls, streaks of clouds across the sky and other-worldly looking ocean scenes. I love the look of crashing waves for 30 seconds in the late afternoon, don’t you?
Tip #1.2) If you’ve got an iPhone, iPod Touch or maybe they’ve got one for those Android phones now too, there’s a great little Free app called “Long Time” which will calculate your exposure times for you! (Here’s the: I have no relation/interest/don’t get paid/etc. from Long Time, kinda disclosure inserted here by those fine folks somewhere in some legal dept.). You know me - More cool toys & apps. By the way, just for an odd “did you know?” - I saw somewhere that the word “app” was voted 2010 top new word of the year. Shoot, I make up new words all the time. Most by accident, via the brain not communicating with the speaking parts.
OK, here’s how to use it. Take your time and get your composition all lined up ready to shot (might was well go ahead and take a shot while you’re there in case the long exposure doesn't work), set your camera to Aperture Priority, and set your aperture for the depth-of-field you’d like, then make a note of the shutter speed your meter gives you. Switch over to Manual Mode and set the same Aperture. Whip out your “Long time” app, enter in the original shutter speed and the number of stops of ND filter you’ve added - It will now calculate the new shutter speed you’ll need. Sweet!
Now, don’t say I didn’t warn you, but there’s something else you may not have known: This was just as much an phenomenon in the good ‘ole film days as it is today, its just that the physics and the after-effects are a bit different now. There’s no need to go into the hows, whats & whys here, that’s another long boring story. It’s just that, above a couple minutes of exposure, there are a few odd things that can happen.
Don’t worry, it’s nothing drastic, nothing’s going to explode, the investigators from Fringe or the X-files won’t get called in, you won’t become sterile, and no, time does not stand still. It’s just that at these real long shutter speeds, the math may start falling apart and not produce the type of image or as an accurate an exposure as you’d expected, so you may need to experiment a bit more -
Which is all part of the fun we have in this exciting hobby we call Photography!
Now - The other fun creative use of Shutter Speed. The Action-Stopper.
Tip #2) On the other end of the scale as you pass from long exposure, thru “normal shutter speed”, you get to practice another art of motion photography - Freezing the Action, with blazing fast shutter speeds: Think 1⁄1000 sec., 1⁄2000 sec. and even higher. Your goal now is to eliminate any blur in the image, stop the motion - Many times in mid-air. This doesn’t mean eliminating the perception of motion; just eliminating blur in the shot.


In these images of birds flying and horses playing polo, although the action is stopped, there’s no doubt about motion in the image! To really stop the action, start with a shutter speed of 1⁄1000 sec. This speed should freeze most common action, but you may need to go even faster for, you guessed it - faster action. It’s going to depend on the subjects speed and how you want to convey it to your viewers.
The compromise (yes again, there’s always a compromise) is that you’ll need a large aperture opening to allow enough light in for a properly lit exposure. Now that most of the newer digital cameras are capable of improved low noise, try dialing up your ISO to 400 or 800 to gain extra speed/light.
Now, the other challange is getting sharp focus on your subject. Here are two ways to accomplish this: One option is to use your “predictive focus tracking”, which tracks your subject refocusing while you hold the shutter button down half-way (pull out the manual for your camera to look this up) or prefocus ahead of time at the point that you’d like to capture the motion. Modern cameras are amazingly accurate with their new focus tracking capabilities, so I’ll normally use either one of these methods, depending, not only on the subject, but also, which direction it’s going.
Many cameras feature a group-focusing pattern, which causes the camera to search for your subject as it moves through the frame - This can be a good thing or it could slow you down and cause you to lose the shot (as the puppy and grandkid go running by). Experiment with your camera to learn the best way to take advantage of each tool it includes. For the prefocus technique, try focusing on a spot where you know the subject will pass through, like jumping horses or motorcycles; practice on the first few that come thru, then lock that focus for the rest. If you can prefocus on the subject as they come up to the jump or point that you’d like to shot them, holding the shutter half-way until just the right moment.
Just remember - Photography is just like any other hobby, be it guitar, bike racing, dance or pottery - This will take practicing, experimenting, learning more about how your camera operates in each situation, then practicing again, experimenting some more, looking at your results (which is where digital comes in real handy - looking at your experiments right away), learn from them and experiment and practice again. Luckily the practice isn’t as boring/repetitious as piano lessons can be - I know, I’ve been there.
Oh yeah, Remember one more very important tip - HAVE FUN!!
Saturday, February 12, 2011
Wildlife
Still in the process of putting together your next lesson, but thought I’d throw in a quick reminder of the day while it’s in my head:
Anything that has nothing to do with elephants is irrelephant.
Have a good day!
Anything that has nothing to do with elephants is irrelephant.
Have a good day!
Sunday, February 6, 2011
Focus52 Week 5; Theme: Framed
Week 5 of a new challenge I've undertaken on my Flickr site.

If you're looking for ways to motivate you, inspire, give you reason to go shoot, this is just one example.
Join an on-line group, create a project for yourself, find something that will motivate you and/or stir up your creative juices.
Look at other peoples projects. Do they have a theme that you can relate too? Is there one that has a challenge that you'd like to attempt?
Projects can be short, as in something you'll complete today. They can be one new photo every day for 365 days. Or, they can be submitting one new photo a week for 52 weeks as I'm doing in this Focus52 group.
The trick is, to find something and get started. I know, that sounds odd coming from someone like me. Someone that's never known what the word Focus means. But, I'm trying it and so can you.
Join Flickr for starters. It's Free to have up to 200 photos and 3 sets. You can always delete photos as you start to max out or, you could join for $24/year and keep adding all you want.
Then, start a project, a theme, a challenge, something new to learn, something new to show someone else. Post your images on your Flickr site and let the world know.
You don't have to be shy about having shots that don't look professional - That's not what it's about! It's about having fun and learning. Even the best professionals out there started as an amateur too.
So... Get started.
Wednesday, February 2, 2011
That Ole Workhorse 50mm lens
Hello again,
Lets talk about that 50mm "only" lens.
For those that have been shooting for awhile, that great little 50mm you once used may have been relegated to the bottom of your camera bag to collect dust, while your more glamorous telephotos, wide angle and other zoom lenses now have all the fun.
Those of you new to DSLR photography probably figure you don’t need a 50mm, after all, your new camera came with an 18-55mm - “Won’t that work?”
Long answer short - Yes, but, No! That “kit lens” is generally a great starter lens, but you’ll soon find that you’ll need to upgrade it... Soon. Look for one or two of the better quality zoom lens, but also consider a 50mm prime lens too - Just for the fun and challenge.
This once popular tool, which came as the “standard lens” for a new 35mm SLR “back in the day”, has now been completely displaced by those inexpensive, distortion-prone mid-range zooms with slow-as-molasses focus, which are now standard stock on most new DSLR’s. I blame the folks in the Marketing Dept. for that.
But at least that mid-range zoom has gotten better and is a great start for your venture into the world of DSLR photography. Keep practicing and learning more.
The 50mm dilemma - They’re not long enough for some scenes, nor wide enough for others. Not being able to zoom makes them more challenging to use. Then, why bother? For most modern day digital photographers, spoiled with zooms, the thought of using, much less buying, a 50mm “only” lens is all but forgotten.
Here’s why you should consider either digging yours out or buying one.
Not only are they excellent for hand-held photography in low-light conditions, but as most have a much wider aperture than many zooms, this allows for excellent selective focus and shallow depth-of-field shots. When stopped down, you can also render a scene tack sharp from front to back.
And, since most prime lens have superior glass, images taken with the 50mm “only” lens exhibit superb sharpness and contrast found only in the more expensive pro-level zooms. Add in features such as low distortion, compact size and lightweight - Maybe you’ll start to appreciate the value and utility of the standard 50mm “only”.
Don’t worry about whether the 50mm lens you have is of the f/1.8, f/1.4, f/1.2 flavor, or, even the one I have, the Macro f2.5. They’re all great. Most are autofocus but you’ll work with manual focus often too. Actually, the Macro versions may be more versatile, as a Macro and a standard 50mm.
I’ve got my eye on one of those f1.4’s though. The f1.2’s may allow twice as much light, faster low-light shutter speeds, shallower depth-of-field & nicer bokeh than f1.4, but - all at a much steeper price.
The angle-of-view of a 50mm lens is about 46-degree (on a full-frame sensor, slightly less on an APC sensor), which is very close to what we see with our naked eye. The problem for most photographers is - 1) it’s not wide enough to capture a large group. 2) it’s too wide for the inside of confined spaces or 3) not powerful enough to bring those distant objects into acceptable image size.
Yeah, so. Work with it!
Knowing the limits of what this focal length can or cannot do to your pictures will lead to better training of your “photographer’s eye”.
The 50mm Shuffle:
While many will dismiss the 50mm focal length as being “compositionally challenged - This is where the extra work/challenge comes in - You have to move yourself (while looking thru the viewfinder) in order to get the desired results. If your subject is too far away, you just shuffle your feet to get closer to the scene. If the space between you and the subject is too tight to include everything into the frame, then you have to shuffle your feet backwards a bit in order to fit everything in.
I know it can seem tough, I’ve been there myself. But that’s part of the fun!
So dig out your old 50mm or go find one to purchase. I found mine on Craigslist for under $80 (make sure you bring your camera to test used ones).
Next time you leave for a “photo-walk” - Take only your 50mm, you may surprise yourself.
Thanks again for visiting.
Friday, January 28, 2011
How To Chose An F-Stop, What They Are & Why You Need To Know
As part of our "Basic Core Fundamental" classes that we produce thru Alternative Focus, we always cover the 4-Fundamentals; Shutter-Speed, ISO, Composition & today - Aperture - What it is and how, along with why to use it.
Aperture settings are an important tool that you'll need to learn when you want to control the 'Depth of Field', which is, how much of the scene, from front to back is in focus - or actually, is out of focus, drawing your viewers eye to part of the scene that is important, while creating a soft diffused background.
From time to time, in order to provide you with some variation from my writing, along with different ideas, I'm going to start testing the idea of including articles written by others in my blog. I'm also combining my writing between this and my Alternative Focus blog as practice to when we expand our services, which will include newer web-sites, newer workshops and new services - Stay tuned to learn more as we unfold all of these new ideas.
In the mean-time, to read more about F-stops go here:
http://alternativefocus.blogspot.com/2011/01/how-to-choose-f-stop-and-why.html
Aperture settings are an important tool that you'll need to learn when you want to control the 'Depth of Field', which is, how much of the scene, from front to back is in focus - or actually, is out of focus, drawing your viewers eye to part of the scene that is important, while creating a soft diffused background.
From time to time, in order to provide you with some variation from my writing, along with different ideas, I'm going to start testing the idea of including articles written by others in my blog. I'm also combining my writing between this and my Alternative Focus blog as practice to when we expand our services, which will include newer web-sites, newer workshops and new services - Stay tuned to learn more as we unfold all of these new ideas.
In the mean-time, to read more about F-stops go here:
http://alternativefocus.blogspot.com/2011/01/how-to-choose-f-stop-and-why.html
Intimate Detail in Outdoor Photography
Hello again,
From time to time, my posts will include links to other articles that I find educational, informative and/or of course, humorous too.
Comment below or on my Facebook, your thoughts on this or anything else about this site - Pros & Cons, so that I can make it even better.
Here is one of my first links:
The process of making an image of magic and mystery
Intimate Detail - Outdoor Photographer
From time to time, my posts will include links to other articles that I find educational, informative and/or of course, humorous too.
Comment below or on my Facebook, your thoughts on this or anything else about this site - Pros & Cons, so that I can make it even better.
Here is one of my first links:
The process of making an image of magic and mystery
Intimate Detail - Outdoor Photographer
Tuesday, January 18, 2011
Ratios, Fractions and Light Balance
Hello,
I was thinking of putting together a quick post on how to balance Flash vs Ambient light, as that's one of the things I've been studying.
Turns out there can be a lot of math involved, which is fine for me as I excelled in my Math & Science classes.
But then I came across a study that shows... "4 out of 3 people have trouble with fractions".
I think I'll wait.
I was thinking of putting together a quick post on how to balance Flash vs Ambient light, as that's one of the things I've been studying.
Turns out there can be a lot of math involved, which is fine for me as I excelled in my Math & Science classes.
But then I came across a study that shows... "4 out of 3 people have trouble with fractions".
I think I'll wait.
Sunday, January 16, 2011
White Balance Tools
Hello again,
I did a post on my Flickr page recently and one of my images still had my Spyder Cube in it as a Grey Card" reference - Which prompted questions on: "WHY?"
So, here's a quick explanation.

I did a post on my Flickr page recently and one of my images still had my Spyder Cube in it as a Grey Card" reference - Which prompted questions on: "WHY?"
So, here's a quick explanation.
All lighting sources have different color temperatures to them. From warm sunlight to yellowish/green fluorescents and blueish tungsten incandescent bulbs. You want to get your White Balance set so that white colors in your image are actually white and not tinted to some other yellow/green/blue shade. With your camera on Auto White Balance, it's going to try and do this for you - Notice I said "try". Generally they do OK, but for accuracy you use a Grey Card. And shot RAW if possible.

Essentially, you're using the black, white and grey areas as a 'known reference' colors in a scene. Most photo processing software such as Photoshop and Lightroom have an Eyedropper tool that allows you to click on a "Grey Card" to set your White Balance - You're telling the software that this is a known, calibrated 18% Grey color, it will then calibrate the rest of the colors to match. You can also use in either Levels or Curves the Black, Grey and White Eyedroppers to set what are called "Black Point & White Point".
Once you've done that for the image with the cube or grey card in it, you save those settings, then when you open up any of the other images with the same lighting, just paste those settings to them (depending on which software you're using) and this allows you to batch process photos for proper White Balance and Exposure.
Now, in this image I've not only left the Spyder Cube in (just for fun), I've also done some extra tweaking of colors too. Go to my Flickr link to see the rest of the set - Playing with toys.
Here's a link to DataColor's tutorials on how to use the Spyder Cube.
spyder.datacolor.com/learn_videos.php
Next post, which is coming up soon, will be on Night Photography.
Thanks again for coming by and reading my blog.
Next post, which is coming up soon, will be on Night Photography.
Thanks again for coming by and reading my blog.
Wednesday, October 27, 2010
Things To Ponder & Wonder While Learning Photography
I love learning new things (as well as teaching them), and great quotes provide just something new to ponder - Especially ones that are not only true, but if they are scientific in nature (as science, art and photography are related) and if it applies to many fields of study (or life) and it has a bit of humor - That's even better!
Many who have followed the life of Albert Einstein know that, not only was he a genius - He also had a great sense of humor.
As you're struggling thru your latest photography challenge, ponder some of his thoughts, maybe it'll make it easier for you to get thru - Or, at least provide a nice smile.
"Anyone who has never made a mistake has never tired anything new."
"Imagination is more important than knowledge."
"The important thing is not to stop questioning. Curiosity has its own reason for existing."
"Do not worry about your difficulties in Mathematics. I can assure you mine are still greater."
"Reality is merely an illusion, albeit a very persistent one."
"If "A" equal a success in life; Then, "A equals "X" plus "Y" plus "Z". Work is "X"; "Y" is Play and "Z" is keeping your mouth shut!"
"The most beautiful thing we can experience is the mysterious. It is the source of all true art and all science. He to whom this emotion is a stranger, who can no longer pause to wonder and stand rapt in awe, is as good as dead; his eyes are closed."
"You see, wire telegraph is kind of like a very, very long cat - You pull his tail in New York and his head is meowing in Los Angeles. Do you understand? And radio operates exactly the same way: You send signals here, they receive them there. The only difference is that there is no cat."
And last but not least, a sign hanging in Einstein's office at Princeton: "Not everything that counts can be counted, and not everything that can be counted counts."
Tony
Many who have followed the life of Albert Einstein know that, not only was he a genius - He also had a great sense of humor.
As you're struggling thru your latest photography challenge, ponder some of his thoughts, maybe it'll make it easier for you to get thru - Or, at least provide a nice smile.
"Anyone who has never made a mistake has never tired anything new."
"Imagination is more important than knowledge."
"The important thing is not to stop questioning. Curiosity has its own reason for existing."
"Do not worry about your difficulties in Mathematics. I can assure you mine are still greater."
"Reality is merely an illusion, albeit a very persistent one."
"If "A" equal a success in life; Then, "A equals "X" plus "Y" plus "Z". Work is "X"; "Y" is Play and "Z" is keeping your mouth shut!"
"The most beautiful thing we can experience is the mysterious. It is the source of all true art and all science. He to whom this emotion is a stranger, who can no longer pause to wonder and stand rapt in awe, is as good as dead; his eyes are closed."
"You see, wire telegraph is kind of like a very, very long cat - You pull his tail in New York and his head is meowing in Los Angeles. Do you understand? And radio operates exactly the same way: You send signals here, they receive them there. The only difference is that there is no cat."
And last but not least, a sign hanging in Einstein's office at Princeton: "Not everything that counts can be counted, and not everything that can be counted counts."
Tony
Friday, September 24, 2010
Learning The Ways Of The Sun & Moon
Well, we finished off our "Sunset under Deception Pass Bridge" workshop with a lot of great photos captured by all that attended. Unfortunately, on the 4th day the clouds did not cooperate so the shots weren't any fun. But, by then so many photographers had heard about our "secret spot", that we had a large party of people just having fun hanging out - and waiting, for a sunset that never showed up.
That's the most important part of our workshops, besides learning more about this fun craft - having fun hanging out with other photographers.
I'm currently at a Starbucks, on my laptop, so I don't have any of my shots with me to show here, but you can quickly go to http://www.flickr.com/photos/masterofmadness to see them.
While I'm on the subject of sunsets and my previous blog was on the moon, I thought I'd let you in on a very useful website and it's software for predicting the times and locations of each.
It's called "The Photographer's Ephemeris" It will allow you to choose a date and location to find out exactly when and where the sun & moon will rise and set, along with lots of other Gee Whiz info for use at your next cocktail party. TOO COOL!
Go to http://stephentrainor.com/tools and download the FREE software he has. It's an amazing piece of work that he's put together. Make sure you download the proper version for your type of computer, and get the Adobe Air program too, as you'll need that to make it work.
The software's pretty self explanatory, so I'm not going to go into how to use it here. But, just in case - Read the tutorials to learn more about the sun & moon than you ever thought you needed to know.
OK, enough for today.
Thanks again for playing along,
Tony
That's the most important part of our workshops, besides learning more about this fun craft - having fun hanging out with other photographers.
I'm currently at a Starbucks, on my laptop, so I don't have any of my shots with me to show here, but you can quickly go to http://www.flickr.com/photos/masterofmadness to see them.
While I'm on the subject of sunsets and my previous blog was on the moon, I thought I'd let you in on a very useful website and it's software for predicting the times and locations of each.
It's called "The Photographer's Ephemeris" It will allow you to choose a date and location to find out exactly when and where the sun & moon will rise and set, along with lots of other Gee Whiz info for use at your next cocktail party. TOO COOL!
Go to http://stephentrainor.com/tools and download the FREE software he has. It's an amazing piece of work that he's put together. Make sure you download the proper version for your type of computer, and get the Adobe Air program too, as you'll need that to make it work.
The software's pretty self explanatory, so I'm not going to go into how to use it here. But, just in case - Read the tutorials to learn more about the sun & moon than you ever thought you needed to know.
OK, enough for today.
Thanks again for playing along,
Tony
Monday, September 20, 2010
More "Gee Whiz" Info For Shooting At Night
Hello,
Well, just had a 2nd night of our "shooting the sun going below Deception Pass Bridge workshop". The weather's been hit-n-miss, but the sunset turned out great and everyone was capturing some great shots. I was busy helping students, so I'm hoping I was able to capture some nice shots too. I'll go out again tomorrow, weather permitting. I'll get some images up here soon. Here's a shot I got from before, tonight's sun was more to the left.

While I'm thinking about it - The reason for this post; When we were hiking back to the cars, we all noticed an almost full moon slowly passing behind the clouds - Another great photo op! Maybe tomorrow.
So, with that came several questions from our group - How to Shoot The Moon - So, here's your next "Gee Whiz" shooting tricks for getting great moon shots - And an upcoming workshop. I'll add those photos samplers later.
There are two things you have to keep in mind when shooting the moon;
First - It's moving! It can actually move a distance equivalent to its diameter every 2 minutes. What this means is that if you try to go for any exposure longer than a few seconds, it will warp itself out of shape - And, the longer the exposure, the more "wiener like" it's going to become.
Second, if you're going to try and have a great, properly exposed moon with great detail and no stretching, and expect some great detail with proper exposure for your foreground objects too - Forget it! There's just too much exposure range to capture them both.
The moon can be very bright on some nights which will cause your foreground to be underexposed. If you expose for your darker foreground - expect an overly blown out & stretched moon.
Now, if you're using a wide-angle lens and the moon is small in the sky, then movement isn't as much an issue. But if you've zoomed in for a unique "Big Moon" shot - Read on.
The trick, which has been performed since the dawn of film, is to make a double exposure. That is - shoot two exposures - One for the moon and another for the foreground, without moving the camera. In the 'old days', you would shoot the 2nd image without advancing the film. Actually, it was more work than that, but that was just how those film days were - Do you still miss them? Today, we can take a couple shots of each element, setting the exposure as needed in each frame, then simply combine them in Photoshop. This provides the added benefit of a lot more control over the final image, with no wasted film and developing fees.
Ah, another digital bonus - Since you've got great moon shots, save them to drop into other photos too! But you didn't hear that here.
Exposures for the foreground should be pretty straight forward (if not, stay tuned to this blog or our Alternative Focus blog www.alternativefocus.blogspot.com for more classes or email me with questions) so go ahead and capture a couple of images, paying attention to you composition skills, then move on to your moon shots.
Now, the trick for getting a great exposure on the moon surrounded by black sky - Start with an exposure of around 1/250 second at f8 and ISO 100 for a full moon, focused on infinity. Jog to about 1/125 or 1/60 for a crescent moon. Now of course, there's going to be a bit of leeway here, depending upon other conditions, but this will get you very close.
There, you now have enough of the basic tricks for great moon shooting. Now go out and practice, study how they came out, learn what worked and more important, what didn't work, and practice again.
We've received many requests, so now we're also putting together more night & low-light photography classes, as well as some star-trail shooting.
Stay tuned to this blog and more importantly our Alternative Focus blog (www.alternativefocus.blogspot.com) for upcoming classes. You'll also find more info & links there to our Facebook, Twitter and everything else photography in the great San Juan Islands & Skagit Valley.
Thanks,
Tony
Well, just had a 2nd night of our "shooting the sun going below Deception Pass Bridge workshop". The weather's been hit-n-miss, but the sunset turned out great and everyone was capturing some great shots. I was busy helping students, so I'm hoping I was able to capture some nice shots too. I'll go out again tomorrow, weather permitting. I'll get some images up here soon. Here's a shot I got from before, tonight's sun was more to the left.

While I'm thinking about it - The reason for this post; When we were hiking back to the cars, we all noticed an almost full moon slowly passing behind the clouds - Another great photo op! Maybe tomorrow.
So, with that came several questions from our group - How to Shoot The Moon - So, here's your next "Gee Whiz" shooting tricks for getting great moon shots - And an upcoming workshop. I'll add those photos samplers later.
There are two things you have to keep in mind when shooting the moon;
First - It's moving! It can actually move a distance equivalent to its diameter every 2 minutes. What this means is that if you try to go for any exposure longer than a few seconds, it will warp itself out of shape - And, the longer the exposure, the more "wiener like" it's going to become.
Second, if you're going to try and have a great, properly exposed moon with great detail and no stretching, and expect some great detail with proper exposure for your foreground objects too - Forget it! There's just too much exposure range to capture them both.
The moon can be very bright on some nights which will cause your foreground to be underexposed. If you expose for your darker foreground - expect an overly blown out & stretched moon.
Now, if you're using a wide-angle lens and the moon is small in the sky, then movement isn't as much an issue. But if you've zoomed in for a unique "Big Moon" shot - Read on.
The trick, which has been performed since the dawn of film, is to make a double exposure. That is - shoot two exposures - One for the moon and another for the foreground, without moving the camera. In the 'old days', you would shoot the 2nd image without advancing the film. Actually, it was more work than that, but that was just how those film days were - Do you still miss them? Today, we can take a couple shots of each element, setting the exposure as needed in each frame, then simply combine them in Photoshop. This provides the added benefit of a lot more control over the final image, with no wasted film and developing fees.
Ah, another digital bonus - Since you've got great moon shots, save them to drop into other photos too! But you didn't hear that here.
Exposures for the foreground should be pretty straight forward (if not, stay tuned to this blog or our Alternative Focus blog www.alternativefocus.blogspot.com for more classes or email me with questions) so go ahead and capture a couple of images, paying attention to you composition skills, then move on to your moon shots.
Now, the trick for getting a great exposure on the moon surrounded by black sky - Start with an exposure of around 1/250 second at f8 and ISO 100 for a full moon, focused on infinity. Jog to about 1/125 or 1/60 for a crescent moon. Now of course, there's going to be a bit of leeway here, depending upon other conditions, but this will get you very close.
There, you now have enough of the basic tricks for great moon shooting. Now go out and practice, study how they came out, learn what worked and more important, what didn't work, and practice again.
We've received many requests, so now we're also putting together more night & low-light photography classes, as well as some star-trail shooting.
Stay tuned to this blog and more importantly our Alternative Focus blog (www.alternativefocus.blogspot.com) for upcoming classes. You'll also find more info & links there to our Facebook, Twitter and everything else photography in the great San Juan Islands & Skagit Valley.
Thanks,
Tony
Saturday, September 18, 2010
OK, OK - HERE'S A BIT OF "GEE WHIZ" INFO
As I prepare for tonight's sunset during equinox workshop, I've got a couple of odd facts for you.
First, the reason for this class on this date - The infamous Deception Pass Bridge, connecting Fidalgo Island to Whidbey Island, which literally has thousand of photos taken of it every year - with good reason - It's a great bridge to photograph.
But, only twice a year can you catch the sun setting directly below the arch of the main span of the bridge! This weekend is one of those times!
So get out there - Oh yeah, you don't know the secret spot to hike to. That spot which allows you to see the sun setting right where you'd like it.
Well, if you haven't already signed up for our workshop, you can either wait till spring for it, and our workshop to happen again, or shoot me an email and I'll describe how to get there.
Now for the odd facts -
Once the sun touches the horizon, it takes only 2 minutes for it to disappear! Don't believe me? Go watch a sunset and time it. Actually go watch a lot of them, they're all different.
2nd odd fact; While you're out there looking at the horizon, put your fingers up and hold them so that you're looking at about an inch of the horizon between them - that is equal to about 38 miles of horizon. Of course, your milage will vary - depending on your horizon. But it's still fun to think about.
OK, talk to you later,
Tony
First, the reason for this class on this date - The infamous Deception Pass Bridge, connecting Fidalgo Island to Whidbey Island, which literally has thousand of photos taken of it every year - with good reason - It's a great bridge to photograph.
But, only twice a year can you catch the sun setting directly below the arch of the main span of the bridge! This weekend is one of those times!
So get out there - Oh yeah, you don't know the secret spot to hike to. That spot which allows you to see the sun setting right where you'd like it.
Well, if you haven't already signed up for our workshop, you can either wait till spring for it, and our workshop to happen again, or shoot me an email and I'll describe how to get there.
Now for the odd facts -
Once the sun touches the horizon, it takes only 2 minutes for it to disappear! Don't believe me? Go watch a sunset and time it. Actually go watch a lot of them, they're all different.
2nd odd fact; While you're out there looking at the horizon, put your fingers up and hold them so that you're looking at about an inch of the horizon between them - that is equal to about 38 miles of horizon. Of course, your milage will vary - depending on your horizon. But it's still fun to think about.
OK, talk to you later,
Tony
Hey - I'm Back!
Hello fellow photographers.
I know, I know, I've been very bad about getting new posts/lessons/ideas out to you lately - Again. I'm sorry, I've just been a busy space cadet, preoccupied with a lot on my mind these last couple weeks/months.
We've also been busy trying to figure out what to do with That Photo Shoppe while looking for at least part-time work. Since the job market is pretty much non-existent, and we're much more comfortable being self-employed, we're working on creating our own jobs.
But, since I've got time on my hands now, I've made a commitment (been told to actually) to getting active again, especially after a bunch of new ideas have come up. The latest being combining the fun of photography with my desire/dreaming of boating. I'm just now starting to put together some concepts and adding some ideas for this blog.
Have any questions/ideas - or - if you're a boater looking for a crew member with a camera - Let me know.
Thanks, I'll be back,
Tony
I know, I know, I've been very bad about getting new posts/lessons/ideas out to you lately - Again. I'm sorry, I've just been a busy space cadet, preoccupied with a lot on my mind these last couple weeks/months.
We've also been busy trying to figure out what to do with That Photo Shoppe while looking for at least part-time work. Since the job market is pretty much non-existent, and we're much more comfortable being self-employed, we're working on creating our own jobs.
But, since I've got time on my hands now, I've made a commitment (been told to actually) to getting active again, especially after a bunch of new ideas have come up. The latest being combining the fun of photography with my desire/dreaming of boating. I'm just now starting to put together some concepts and adding some ideas for this blog.
The workshops have still be doing OK though. Some have been smaller than normal while others have sold-out, and everyone has a good time. We're in the middle of putting together even more.
Keep in touch to learn about those.
Here's our workshop site: http://www.alternativefocus.
Our store's site: www.thatphotoshoppe.com
My Flickr site: http://www.flickr.com/photos/
Our store's site: www.thatphotoshoppe.com
My Flickr site: http://www.flickr.com/photos/
Have any questions/ideas - or - if you're a boater looking for a crew member with a camera - Let me know.
Thanks, I'll be back,
Tony
Thursday, May 6, 2010
Long Time No Post & That Photo Shoppe is Closing
Hello to the handful of people that have actually found me and read my stuff - When I get around to posting something.
It's been a busy & crazy spring, I've got plenty of stories started, just haven't have a chance to finish and post them. I'll get back to that soon.
But the big & Sad news of the day is the closing of That Photo Shoppe, our photography store in Anacortes, WA.
Times were pretty slow this past year, which had us moving to this current location last summer to lower our operating costs, which helped, but at the same time, the old saying "location, location, location" - or lack of, has actually made things worse. Even though we're only a 1 1/2 blocks from our old store, so many customers thought we were gone and never found us. While, at the same time we started picking up new customers, especially ones needing photo restoration and printing services, but alas, it's still not been enough to make this 'location challenged" store work as we'd like. There's just not enough foot traffic for new customers to find us and a neighbor has some large dumpsters that hide the view of us from the main street, even though we're only a 1/2 block back.
But even with all that, the momentum has started to return and our workshops have been very successful.
But then came a new challenge. We've been on a month to month lease for 10 months, and the rent's reasonable for the space we're in, but the landlord (who's actually been very good to us) is planning an extended trip to Greece and would like to have us sign a 1-year lease before he leaves. We're not willing, able or wanting to commit to this space for that amount of time. Sorry.
We're in the middle of looking a several other retail spaces, but as of today, time has run out. So, the hard decision to "temporarily close down" until better options come along was made.
We're still in the process of buying out QuickSilver Photo Lab in Bellingham too, which is not complete nor set in stone either - Adding to the frustration, as one decision about how to deal with the store hinges on the other decisions about the other store! Make sense? Got any ideas?
So, that's the news that's news today.
Stay tuned. For those of you who (whom?) know us, or would like to contact us, all the web-sites, phone numbers and emails for That Photo Shoppe and Alternative Focus (our workshops company) will remain active during this "time of change".
Also, Email me at tlockemm@gmail.com if you've got any questions or ideas, not only for either one of our stores, our workshops or this blog.
Thanks again,
Tony D. Locke, MM
It's been a busy & crazy spring, I've got plenty of stories started, just haven't have a chance to finish and post them. I'll get back to that soon.
But the big & Sad news of the day is the closing of That Photo Shoppe, our photography store in Anacortes, WA.
Times were pretty slow this past year, which had us moving to this current location last summer to lower our operating costs, which helped, but at the same time, the old saying "location, location, location" - or lack of, has actually made things worse. Even though we're only a 1 1/2 blocks from our old store, so many customers thought we were gone and never found us. While, at the same time we started picking up new customers, especially ones needing photo restoration and printing services, but alas, it's still not been enough to make this 'location challenged" store work as we'd like. There's just not enough foot traffic for new customers to find us and a neighbor has some large dumpsters that hide the view of us from the main street, even though we're only a 1/2 block back.
But even with all that, the momentum has started to return and our workshops have been very successful.
But then came a new challenge. We've been on a month to month lease for 10 months, and the rent's reasonable for the space we're in, but the landlord (who's actually been very good to us) is planning an extended trip to Greece and would like to have us sign a 1-year lease before he leaves. We're not willing, able or wanting to commit to this space for that amount of time. Sorry.
We're in the middle of looking a several other retail spaces, but as of today, time has run out. So, the hard decision to "temporarily close down" until better options come along was made.
We're still in the process of buying out QuickSilver Photo Lab in Bellingham too, which is not complete nor set in stone either - Adding to the frustration, as one decision about how to deal with the store hinges on the other decisions about the other store! Make sense? Got any ideas?
So, that's the news that's news today.
Stay tuned. For those of you who (whom?) know us, or would like to contact us, all the web-sites, phone numbers and emails for That Photo Shoppe and Alternative Focus (our workshops company) will remain active during this "time of change".
Also, Email me at tlockemm@gmail.com if you've got any questions or ideas, not only for either one of our stores, our workshops or this blog.
Thanks again,
Tony D. Locke, MM
Wednesday, January 13, 2010
5.8 Of Tony’s Collection of Photography Tips and Tricks

It’s that crazy time of year again, trying to start off a new year (hopefully with new toys from that jolly Santa dude) and figuring out which, if any, resolutions to make or even keep.
But in between tearing down and disposing of the tree and all it’s trimmings (you did recycle your tree didn’t you?), cleaning up after the long holiday weekends and getting back to work - Don’t forget to take time for, what is among my favorite hobbies, and should be yours too - Photography.
As I study more photography related things and talking with those learning this fun hobby, I keep coming across a handful of important basic tips & tricks that every photographer that’s been at it awhile should already know, but may have forgotten, and those that are just starting out should learn now.
So, as my mind starts to wander off for awhile, I’ll start thinking to myself, “...These basic ‘tricks’, this is what people just beginning REALLY need to know. I haven’t posted anything new for awhile, so I should put some of these ideas/tips onto my blog today…”
Then, shortly after that, as usual, my mind started to wander off somewhere else again. It’s a curse I tell ya. One of many that I live with.
Hence, only 5.8 tips for today. But I’ll get to the others soon.
So, if you unwrapped a shiny new digital camera, and started wondering “what now” - Read on.
While these tips apply to “point-n-shoot/happy-snappy” cameras, if you’ve got a shiny new DSLR, you can play along too.
THE BEST PHOTOGRAPHY TRICK OF ALL TIME -
FOR ONE OF THE MOST FRUSTRATING CAMERA ISSUES OF ALL TIME -
SHUTTER LAG
Tip #2; Think Like A Pro; Work the “Magic Hour” - Dinner and/or breakfast can wait.

Hey, if you want those great shots you see the pros make, you’ll soon realize, you may lose a lot of sleep. If you drool over those award-winning, breathtaking landscapes, be it a mirrored lake with shimmering colors in the woods or golden clouds painted across the sky... just remember, someone got up long before the rooster crows to be ready and in place with their tripod as that sun rose. If you’re like me, not one for getting up early, you’ll miss out on a lot of beautiful sunrises.
There’s an hour during sunrise, and then another hour while the sun sets, that are known as the “Magic Hour”. This lower angle of the sun, shining thru a larger, denser portion of the atmosphere creates those rich, saturated tones, plus something photographers call “Golden Light”. It’s an amazing how this golden glow makes everything (and everybody) look beautiful. Normally dull and metallic-gray grain silos, as well as glass high-rise buildings look enchanted and every mountain and valley look breathtaking.
It’s a complete opposite once it becomes midday sun. Once the sun gets up high in the sky, and if there are no clouds, it creates much harsher shadows and more severe, blown-out highlights that your camera can’t deal with. Besides, your photos won’t be quite as exciting either. Landscape shooting can be a terrible experience unless just the right amount - and type, of clouds are helping diffuse that bright light.
That’s what many photographers call “Siesta Time”. You’ll either need to take a nap (since you were up so early), find some interesting shaded areas, or move inside for awhile, anticipating the coming sunset.
Now, sunsets seem to have a different color range to them. Some say it’s because in the morning, the dust (and smog if you’re in the city) haven’t had a chance to get stirred up yet, which creates more ‘stuff’ in the air for the sun to shine thru at night. I’ve also found that the clouds are generally different at the end of the day too - Or, it could just be me. As I said, I’m not a morning person, so I haven’t compiled a whole lot of data on this. I also live on an island that has the mountains of the mainland to the East and an ocean to the West, which in itself will create different looks during the “Magic Hour”.
Tip #2.6; One other tip that helps earn it’s extra 0.6th of a point. Don’t only look at the sunrise/sunset direction - Turn Around! You’ll find amazing things being lit up in all those hues too. I’ve had numerous occasions that the sunset was kind of boring, but turned around and was awarded with a fantastic light show across snow capped mountains, forests or bridges to photograph. And, just because the sun has dipped below the horizon, don’t pack up and leave yet - Many times, there’s lots more to see still to come. Let everyone else pack-up & go, you’ll have the best for yourself.

Tip #3; For that cool, professionally blurred-background look - Shuffle yourself back a bit more - OK, now zoom back in until you’ve got your original composition.
In photo-geek terms, what you’re creating is a limited depth of field.
What you’re doing as a photographer, is deciding - Which part of the scene, front-to-back, is in focus. Subject Yes; background trees/buildings/fences, etc., No.
This professional looking effect is easy to get if you have a DSLR, as you have different lens options and full aperture control, allowing you to set-up a wide aperture (a low f-stop number like f4) to accentuate the effect, while only a handful of point-n-shoots allow it.
So, on a pocket cam, choose the Portrait mode pre-set. Now, have your subject move away from the background - the farther, the better. OK, now stop them there and say ‘stay’. Now it’s time to use the ‘ole “walk-backwards-and-zoom-back-in trick”. Here’s how - Standing further away from your subjects (the farther, the better), and then using the camera’s zoom to “bring you” back up close - This creates this “shallow depth of field, background out of focus” trick.
It’s all because of some weird optics quirk, that, even if I understood it myself, I wouldn’t be able to describe here. It’s all magic I tell you, so you’ll just have to trust me on this one and give it a go. Now, also beware that when you’re looking thru your view-finder or the LCD screen on the back; you won’t see the effect yet. It’s not until you take the picture that you’ll see it. So, practice, review, practice, review & practice again - pixels are free. You don’t have to worry about how much film you’re wasting. Get out and play.
Don’t worry about the strange looks you may get, backing way up, and all that. Strange looks are just part of being a photographer, you’ll get caught doing plenty of other odd things in an attempt to get that great photo. Me, as a landscape photographer, which likes the “low-level” look, I spend a lot of time lying on the ground with knee-pads. Imagine the looks and ribbing I get.
Tip #4. Blast that flash outdoors.
I know, I know, many of you think of your flash for only use inside at parties. It’s probably never occurred to you that you can also use the flash when you’re taking pictures of people outside on a bright, sunny day too. It wouldn’t occur to the little guy inside your camera either. So you’re going to have to trick him a bit.
Here’s how it works, the camera’s little guy inside, you know, the one that figures out everything need for a perfect photo (and creates that shutter lag) “measures” the scene in front of the lens and goes “Whoa, there’s tons of sunlight” and won’t use the flash. But, he’s not smart enough (except on some of the newer, whiz-bang “face recognition” models and DSLR’s with different meter modes) to realize that the face you’re photographing is in the shadow. You’re just going to wind up with a dark, silhouetted person now.
Here’s the secret, that’s a very common photographer’s trick. Force the flash on. Your flash can now provide just the right amount of “fill light” to your subject’s face - without changing the exposure of the background.
This neat trick will not only eliminate silhouettes, it also provides a very flattering light, which softens smile lines and wrinkles, while putting a nice little twinkle in the their eyes.
Tip #4.2; Though, if a silhouetted person looking into a sunset is what you’re looking for, then please disregard Tip #4, as those can be great compositions too.
Tip #5 Buy some elbow macaroni - Leave your tripod at home.
A problem with every camera is that “getting blur from camera motion” syndrome. We all know - “Use a tripod.”
But, if you didn’t feel like dragging it thru multiple airports while on vacation, try this - We all know the trick about using a wall, parked car, tree, pillar, door frame, or any other stationary object, but the problem that often comes up is - They’re never angled that direction you need to point your camera.
But here’s a great trick: Either bring a bean-bag or once you get to your destination, buy a bag of elbow macaroni and use it as a bean-bag. I even know of some travelers that will bring a little, empty bean-bag ‘pillow case’ that packs flat. Then they’ll either buy some beans when they get where they’re going, or slide the bag of beans or macaroni inside. It looks nicer that way and you don’t have to worry about it breaking and spilling.
Set your new, high-tech camera holder on whatever solid object you have handy, set you camera on top, tilt and aim as needed and fire away - Well, actually, when you push the shutter with your camera on this “bean-bag”, you may still cause motion. So, you’ll get better results if you use the built in “shutter-timer”. Set it to the 10-sec (or 2-sec if you’ve got it) option, aim, press the button (run over to join your friends) then in 10-sec, without you disturbing the movement of the camera, your camera will take a perfect, blur-free image.
People might think, seeing you with your macaroni, you’re a genius, a nut-case, or a genius nut-case, but never mind. It works.
There actually are now, bean bags made with a tripod screw on them for attaching your camera. Most any camera supplier will have them. Great idea.
Tip #5.3 This is actually a quick, little tip;
When you’re finished with that bag of macaroni, and you’re packing to head home - donate it to a local food bank or church.
There you have it folks; I actually came up with a little more than Five tips, and my mind only wandered off a couple times.
Now go shoot something!
Again, Thanks for playing along. Hope I did a good job of proof reading.
Tony D. Locke, MM
Still reigning - Master of Madness
Subscribe to:
Posts (Atom)